Frameworks & Controls
Frameworks & Controls is where you track your compliance work in Tellus.
Frameworks & Controls is where you track your compliance work in Tellus. A framework (like ISO 27001) groups requirements into sections, and each section holds the individual controls you implement and prove.
From here you can open a framework, drill into its controls, assign an owner, set a status, and attach evidence that shows each control is in place. This is your day-to-day home base for moving your compliance program forward.
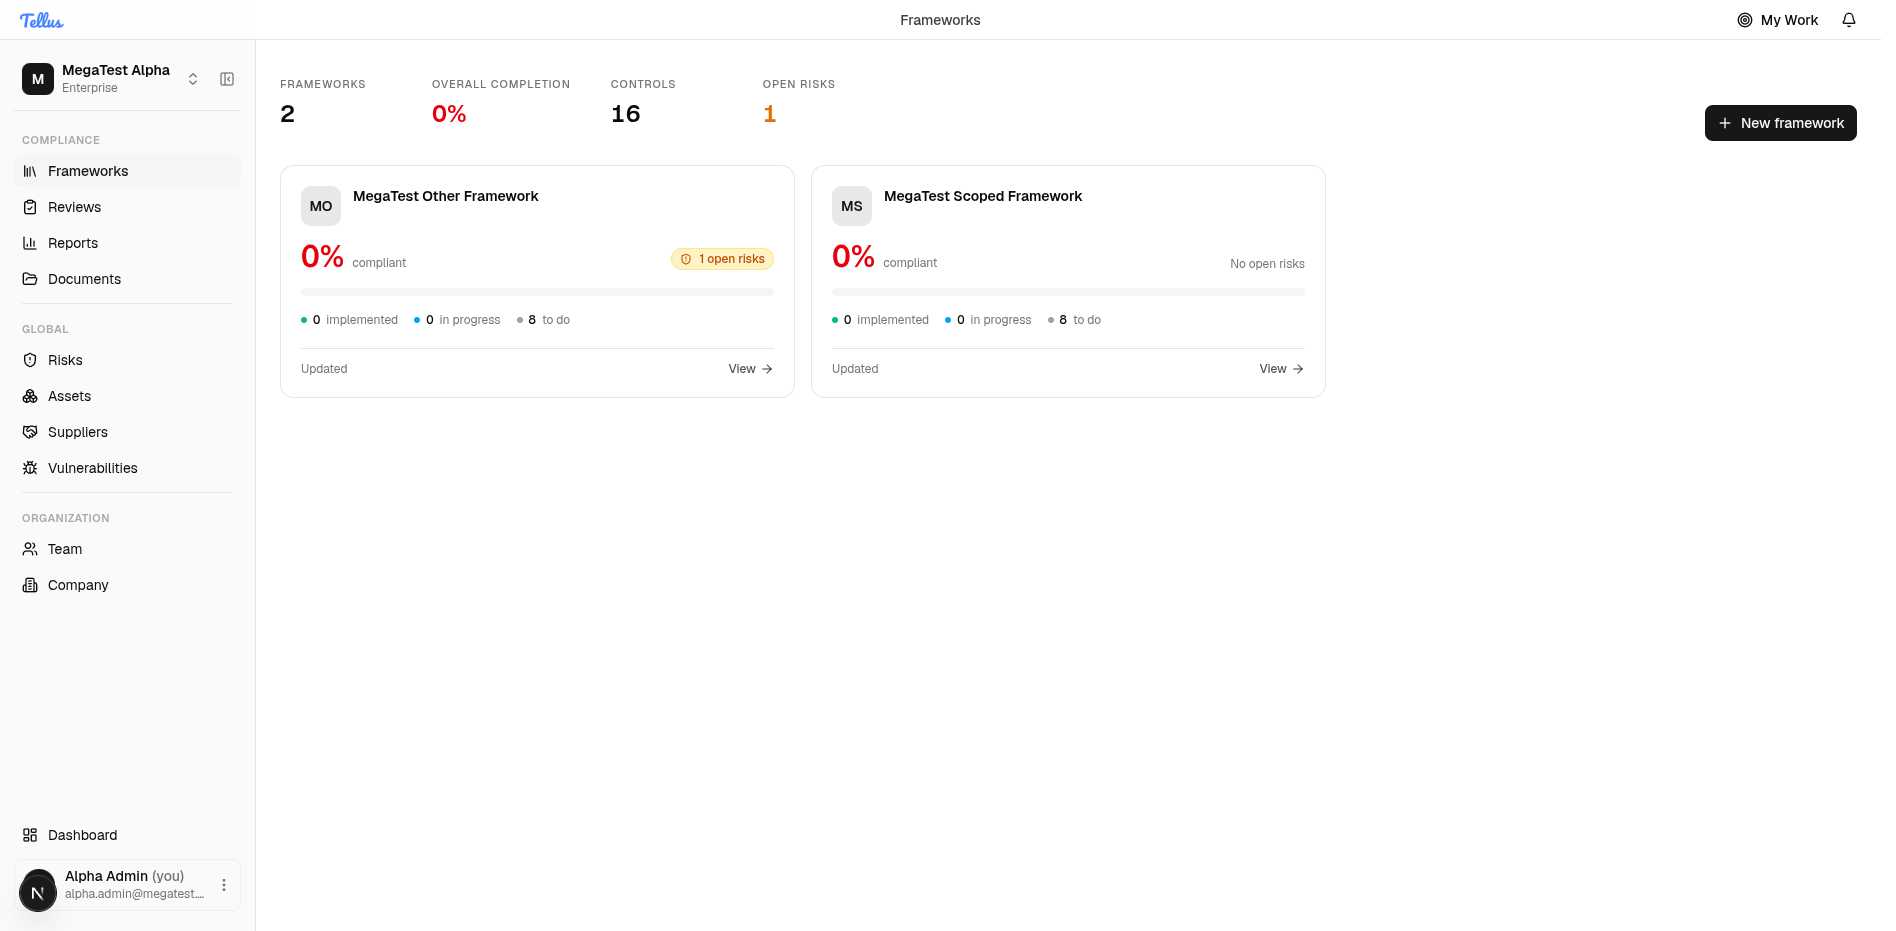
Open the Frameworks list
- In the left sidebar, under the Compliance heading, click Frameworks.
- You land on a list of every compliance framework your company tracks.
- Read the summary strip at the top to see your number of frameworks, overall completion, total controls, and open risks.
- Scan the cards to see, at a glance, how complete each framework is and how many controls still need work. Each card shows its completion percentage, open risks, and a bar of implemented / in-progress / to-do controls.
Tip: The New framework button at the top right lets you add another framework when you're ready.
Open a framework to see its sections
- Click any framework card to open it.
- Use the section list on the left (for example, Organizational Controls A.5 or Access Control A.8) to find the group of controls you want to work on.
- The main area shows the framework name, a progress summary (completion, implemented, in progress, open risks), and a searchable table of sections.
- Each section row tells you how many controls it has and how far along they are.

Browse the controls in a section
- Click a section to open it. Its individual controls appear in the left panel (for example, A.5.1 Information Security Roles and Responsibilities).
- Each control shows its status (such as Not Started) and priority (such as Critical or High).
- To narrow the list, type in the Search controls… box or use the Status filter.
- Click a control to open its full details.
Tip: Until you pick a control, the main area shows a Select a control prompt — that's expected.

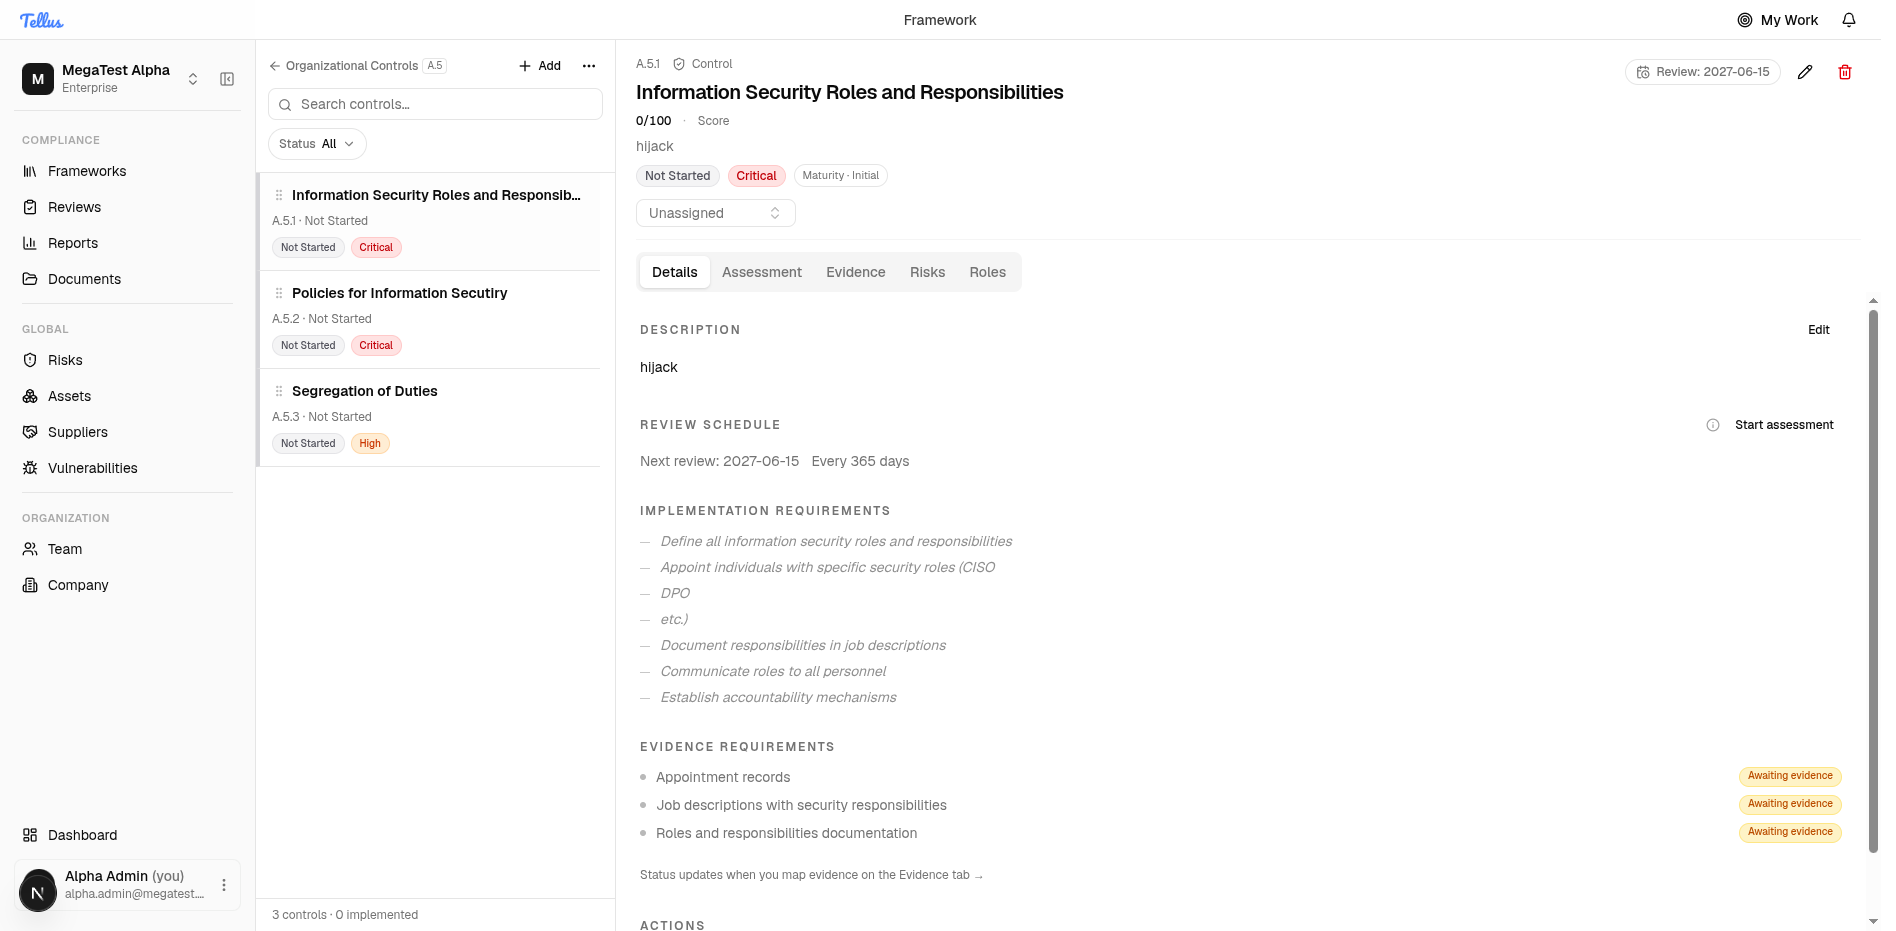
Read a single control's details
- Open a control to review everything about it in one place.
- The header shows the control code (such as A.5.1), title, score, status badge, priority, and maturity.
- Read the Description and the implementation requirements and evidence requirements so you know what's needed.
- Use the row of tabs — Details, Assessment, Evidence, Risks, Roles — to move between the control's details, assessments, linked evidence, related risks, and assigned roles.
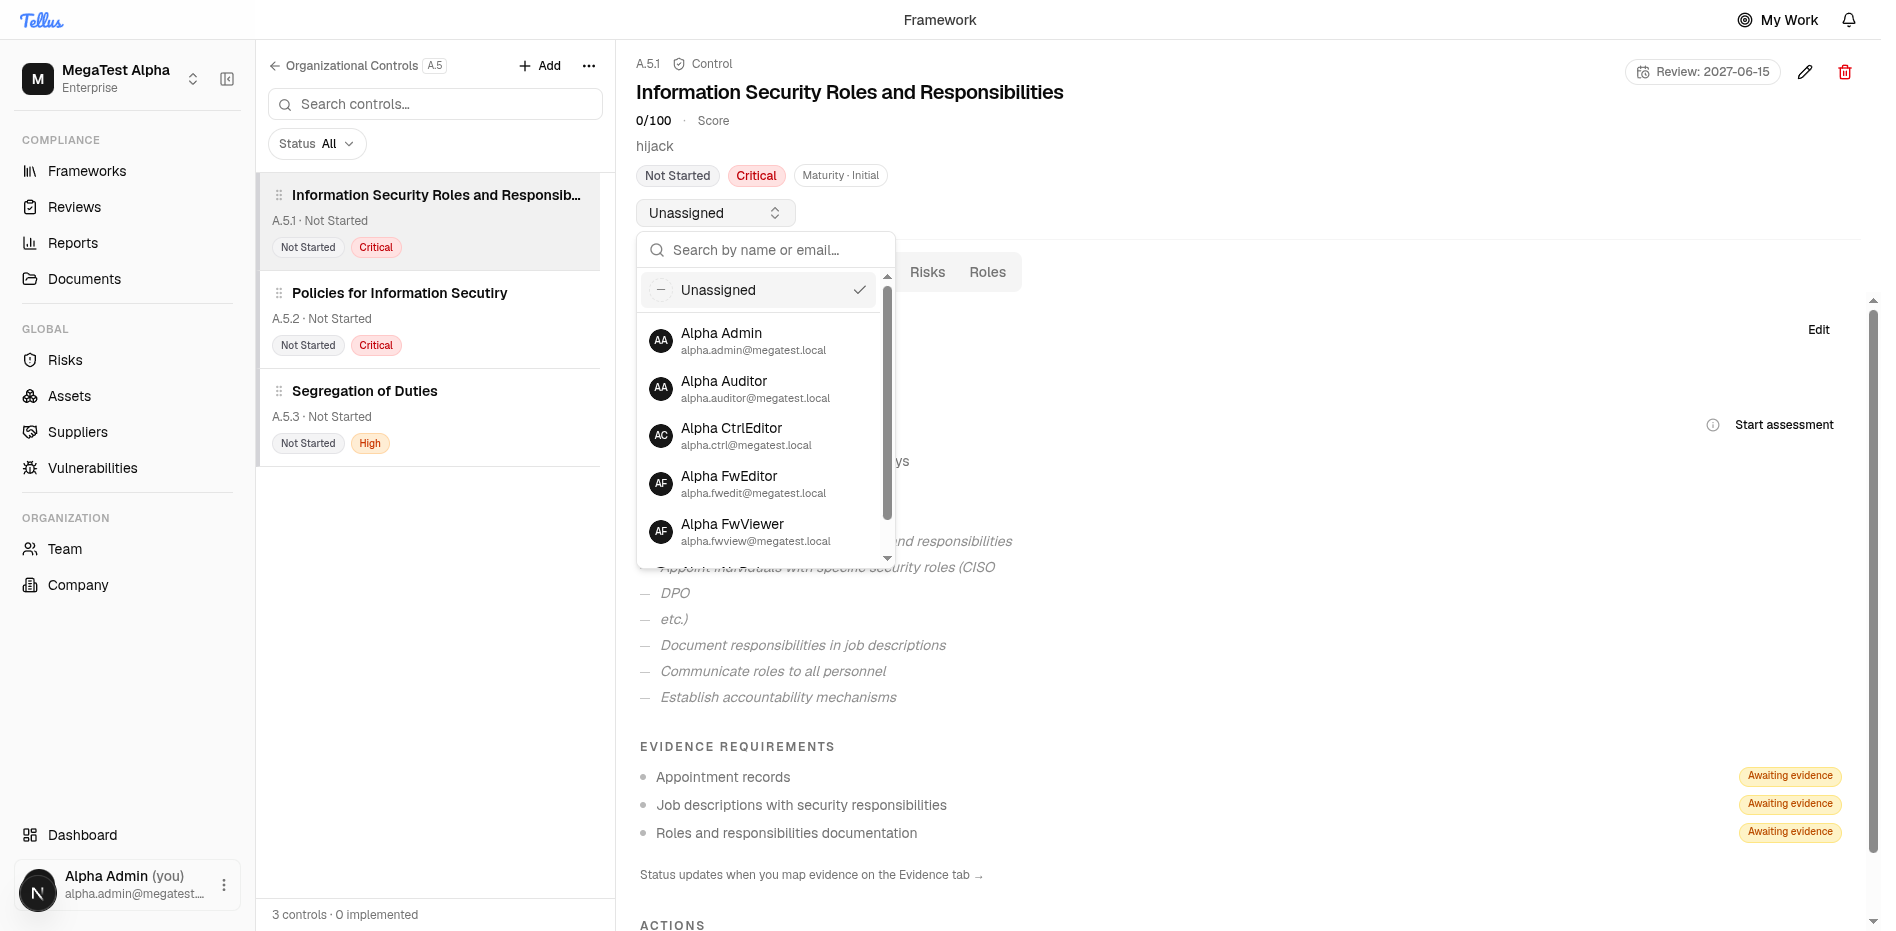
Change the control owner inline
- Find the owner selector just below the control header (it reads Unassigned when nobody is set).
- Click it to open a searchable dropdown listing your team members, each with their name and email, plus an Unassigned option at the top.
- Pick a teammate from the list to make them the owner.
- Choosing them saves the change immediately — there's no separate save step.
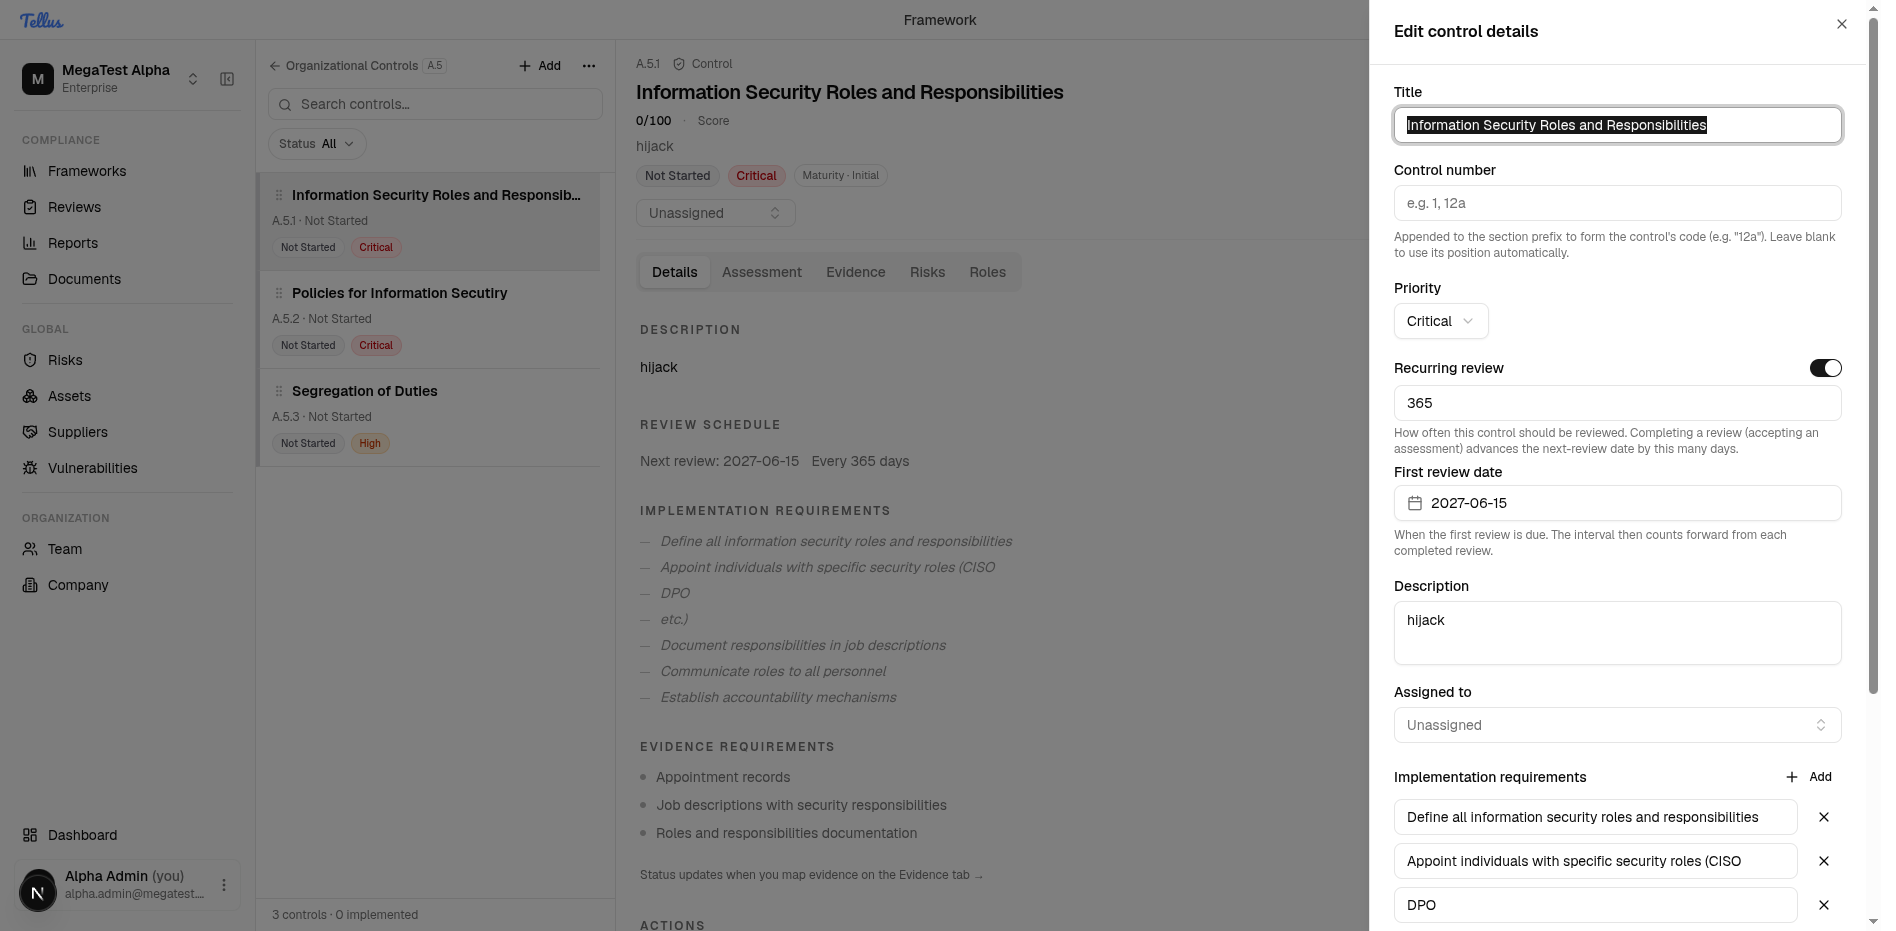
Edit control details and other fields
- Click the pencil Edit control button in the control header to open the Edit control details dialog.
- Adjust the fields you need: Title, Control number, Priority, the Recurring review toggle (with interval and first review date), Description, the Assigned to owner picker, and the list of implementation requirements (you can add or remove them).
- Click Save changes to apply your edits, or Cancel to discard them.
Tip: There's no status dropdown in the header, and the Edit control details dialog does not change status either. A control's status is driven by its assessments — run an assessment (the Assessment tab or the Start assessment action) to move where the control stands.
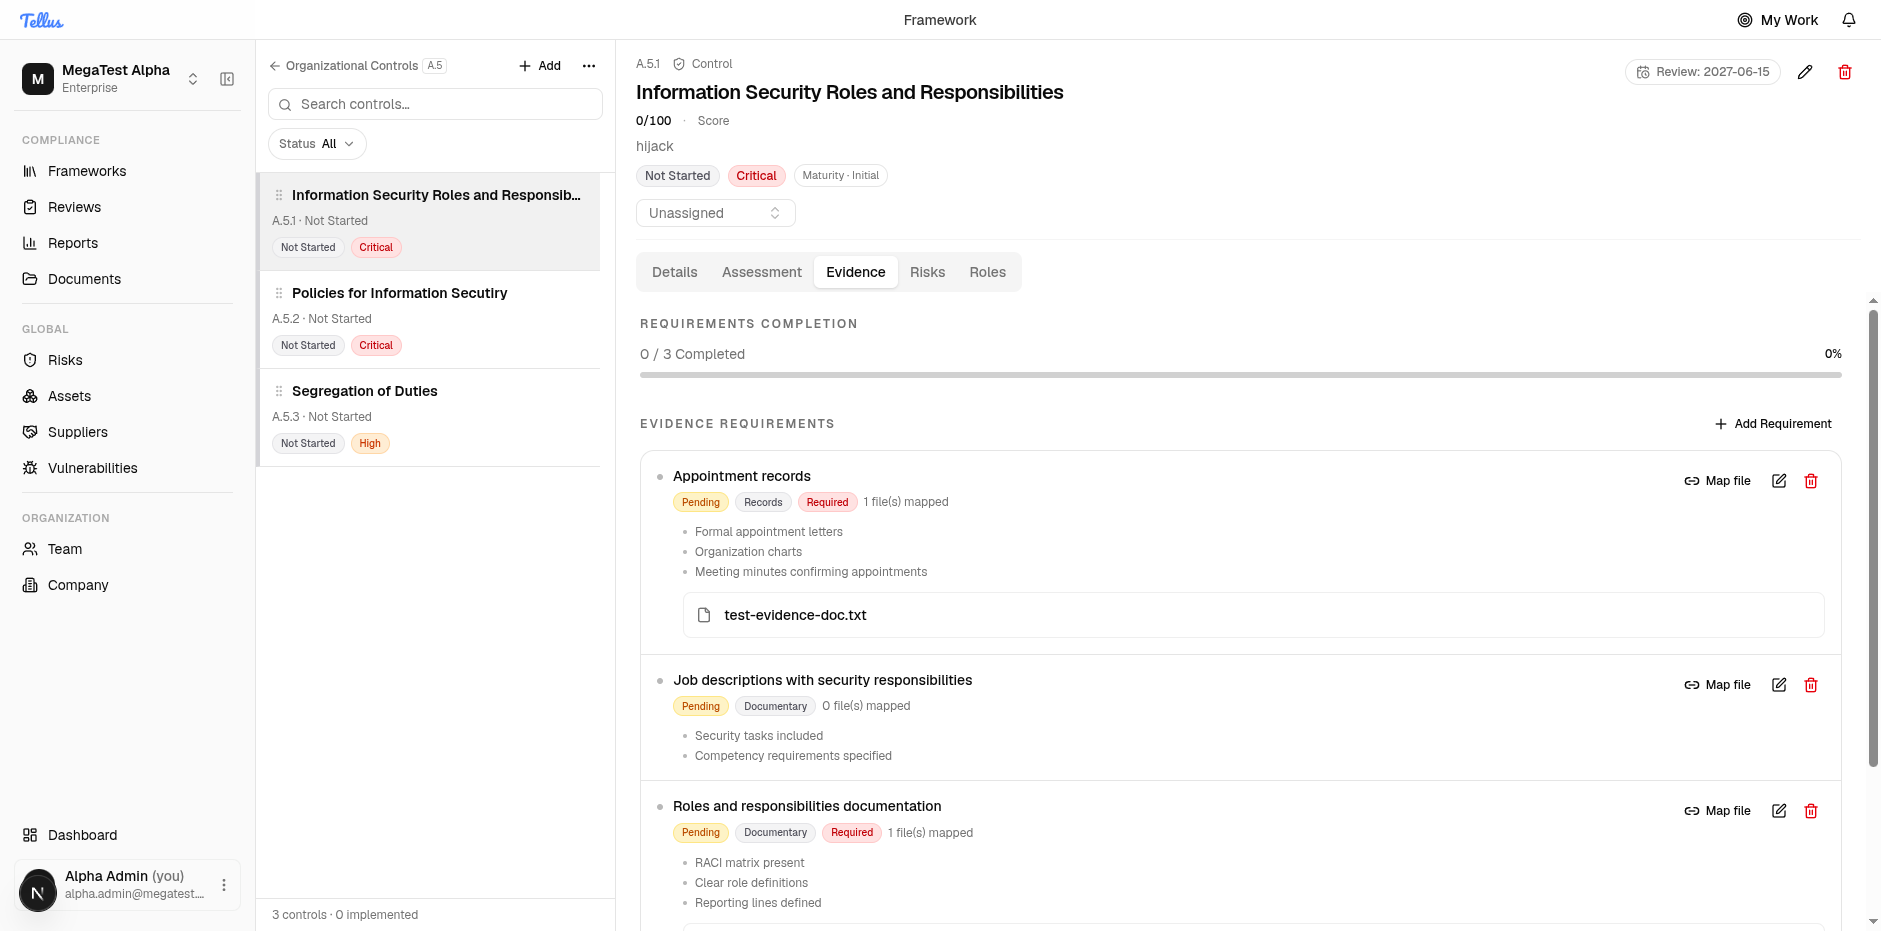
Link and manage evidence
- Open the Evidence tab on a control to prove it is in place.
- At the top, the Requirements Completion progress bar shows how close you are to fully evidenced.
- Each evidence requirement (for example, Appointment records) lists its status and how many files are mapped.
- Click Upload Files to add a document. Uploaded files appear in the All Documents section with Download, Map to requirements, and Unlink from control actions.
- Click Map file next to a requirement to connect a document as proof. As you map files, the completion bar moves up and the requirement is marked satisfied.
Tip: Use Add Requirement if a control needs an evidence requirement that isn't listed yet.